Hey guys! I want to share my thoughts on the whole situation with Phoenix Comic Con. I apologize for being late with this. I had so much going on in real life. I'm so glad to finally be able to do this! Let's get to it!
Thank goodness that no one got hurt and that nothing major happened. I want to thank the police for catching the culprit before he could do anything and for protecting everyone, especially Jason David Frank (since he was the major target). I'm glad that he and everyone are safe and that they're not letting this ruin their weekend. I hope that the culprit not only goes away for a very long time, but also to get the help that he desperately needs.
Because of what happened, Phoenix Comic Con is banning all prop weapons for the rest of the weekend. Some people are outraged by this decision and others are fine with it. I can see both sides of the argument.
Cosplayers work very hard to make their props. It takes a lot of time, effort and skill to make them. In most cases, it's pretty expensive to make (depending on the materials). Those who are upset feel that everyone is getting penalized for what a single person did. They also feel that they worked very hard for nothing. As a cosplayer myself, I understand this and can see why some people are upset.
I also understand why PCC are doing this. They want to make sure that all the attendees and guests are safe and to prevent a tragedy. This ban isn't the end of the world. You can still bring your props to another convention or take photos with it outside the venue. We now live in a world where crazy shit happens unexpectedly. It's better to be safe than sorry. We all must be very careful when we're out. If you see something then please say something. You will not only save yourself, but you will save so many people!
Do I think that all prop weapons should be banned? No. I think that those made with certain materials should be allowed. Do I think it's wrong for Phoenix Comic Con to enforce this ban? Of course not! This ban is for everyone's safety and I respect their decision.
Feel free to post your thoughts!

Cosplay is Rated E for everyone!
Saturday, June 3, 2017
Saturday, March 18, 2017
Mei's Hairpin Tutorial (Overwatch)
Hi guys! This is a tutorial on how I made Mei's Hairpin from Overwatch! She's one of my favorite characters in Overwatch and I plan on cosplaying her in the future! Her hair pin is pretty easy to make! I already had the materials in my house so it cost me $0. Some of you guys might already have most of the materials and even if you don't have some, it's not super expensive!

I forgot to take photos of some parts and I apologize for this! I will try my hardest to be as clear as I can! I will break the tutorial in parts: Symbol, Beads, Stick, and Ball! Let's start this tutorial!
You will need:


You will need:
- Chopsticks
- Paper Mache Ball or Table Tennis Ball
- Sticky Back/Adhesive Craft Foam Sheets or regular Craft Foam Sheets
- Bead Thread or String
- Beads (in the photo there's 2 but I used 3. It's up to you)
- Silver, White, Light Blue, and Red Acrylic or Spray Paint
- Mod Podge
- Varnish
- Needle
- Paint Brushes
- Scissors
- Xacto knife
- Hot Glue Gun & Sticks
- Paper
- Sharpie, Pencil, or Pen
- Sand Paper
Symbol
Step 1: Draw the pattern. For the symbol, you need to draw a diamond/square shape, a petal-like shape, and a small circle. Then cut them out and put the pieces aside.

Step 2: Get your craft foam ready. If you're using sticky craft foam sheets then you can layer them together to make it thicker (stick the sticky sides together and make sure that the outside parts aren't the sticky sides). If you're using regular craft foam and it's thin then you can hot glue sheets together! (Note: This is for the square/diamond part of the symbol. You can do this for the other pieces as well if you want to, but you don't have to do it. If your craft foam is already thick then you can skip this). Then transfer your pattern pieces to your craft foam, trace it out and cut with scissors or an xacto knife. You need 1 of the square/diamond, 2 of the small circle (1 front and 1 back) and 8 of the petals (4 front and 4 back)
Step 3: Attach the rest of the pieces together on the square/diamond piece. Attach 4 of the petals first and then attach the circle in the middle. The petals and the circles were made out of the sticky craft foam so I just sicked them together. If you're using regular craft foam then hot glue them together. The petals should be sticking out.


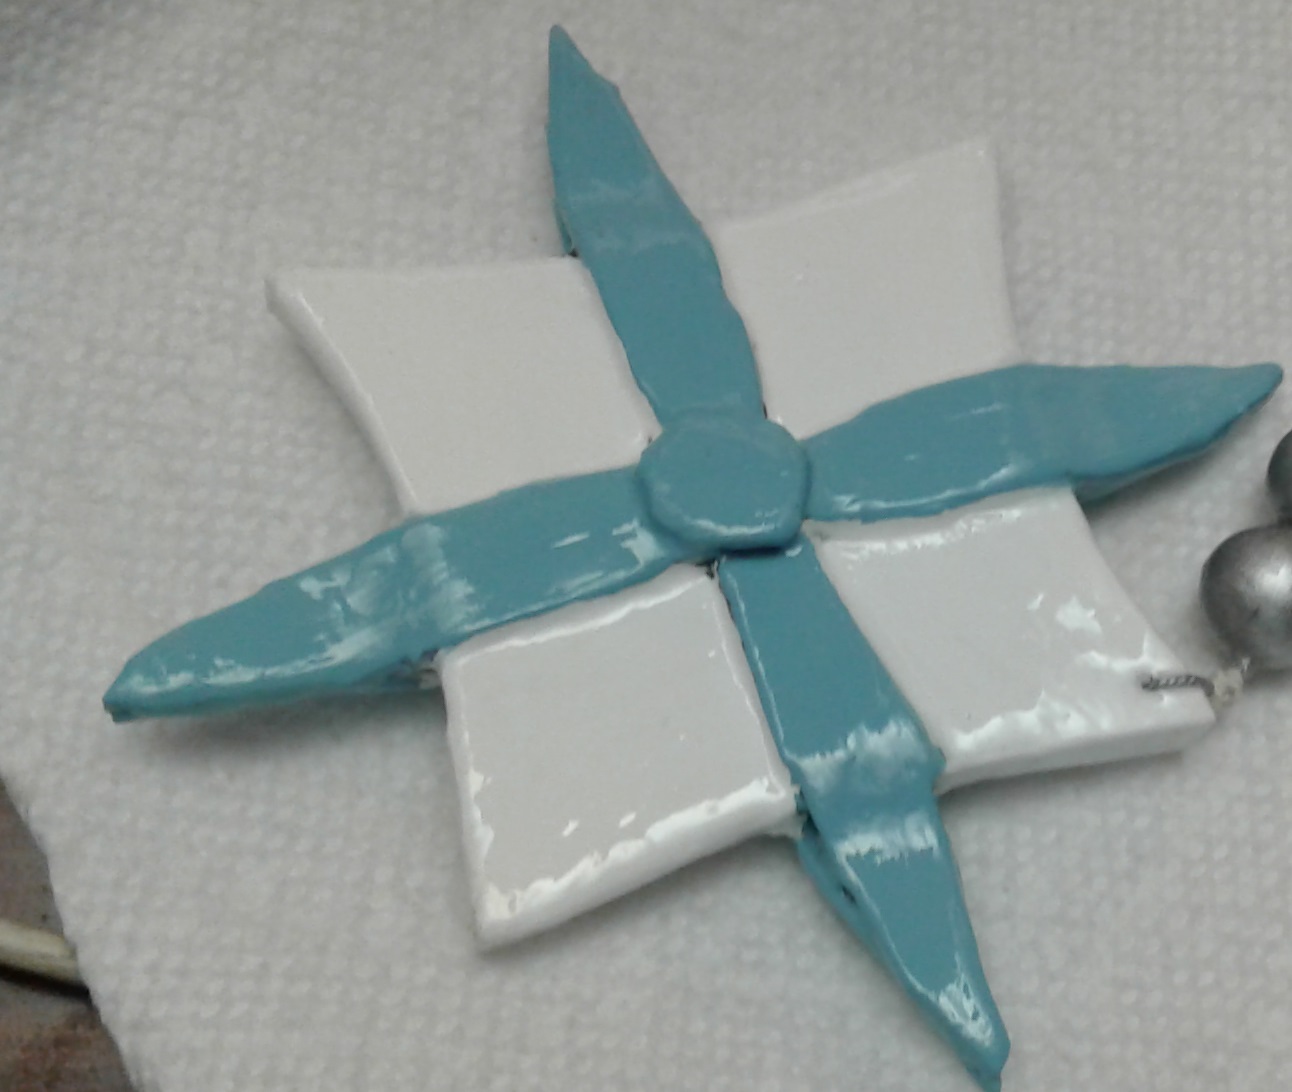
Step 4: Repeat Step 3 on the other side. Make sure that the back petals are parallel to the front petals. Stick them together and press with your fingers from the tip to the edge of the square. If you're using regular craft foam then hot glue it and be careful. Sand it a bit with sand paper. You should get something like this:

Step 5: Apply about 4-5 layers of Mod Podge to the whole thing with your paint brush (front, back, sides, everything!). Wait until a layer dries before adding another layer. You have to apply Mod Podge, otherwise when you paint, the foam will absorb it and it won't look great.
Step 6: Paint the square white and the petals and circle light blue. You can use either acrylic or spray paint. Then pinch a small hole on a corner of the square with a needle and then coat the whole thing with varnish!
Symbol is done!
Beads
Step 1: Mei's hair pin has 2 beads, but I used 3 because I can! The beads that I used were jewelry beads. Sand your beads first. Then put a string or a bead thread through them and tie the ends. Then paint the beads with either silver acrylic paint or silver spray pant. Let it dry and coat with varnish. Then wait for it to dry.

Step 2: Get one of the ends of the string (cut it a bit if it's long) and put it through the hole of the symbol. Tie it a few times so that it's secure. Cut off any excess string.
The symbol and beads are together!

Stick
Step 1: Cut two circles of craft foam (make one of the circles smaller). If the circles are thin then layer them out like before. Sand them and the chopstick a bit. Then with your Xacto knife, pinch a small hole on the center of both circles. Layer the circles together (small circle on the bottom and bigger one on the top) and then skewer both circles with the chop stick. Make sure that the top has a bit of the chopstick sticking out.
Step 2: Apply 4-5 layers of Mod Podge to the whole thing and then paint the whole thing silver. Then apply a few coats of varnish.

Step 3: Get the other end of the string. Wrap it around the top part of the stick and tie it a few times and you should have this:

Ball
Step 1: Get your ball and cut a small hole in it with an xacto knife. Then apply a few layers of Mod Podge. I used a paper mache ball that I have. If you're using a table tennis ball then you must sand it first before you add Mod Podge!

Step 2: Paint a few coats of red. Let it dry and then coat it with varnish.


Finally!!
Get the stick and put a crap ton of hot glue on the top, shove it to the hole of the ball and hold it for a bit. Then hot glue the edges and hold. It will dry in a few minutes!
Finally, put it on and be a-Mei-zing!


Thanks for reading my tutorial! I hope it was helpful to you! If you have any questions then feel free to comment below!
Sunday, March 12, 2017
Women in Comics 2017

Hey guys! The next convention that I will be at is Women in Comics aka WinC Con 2017! It's a small and free convention and will take place on March 25th at the Bronx Library Center from 11 a.m.- 7 p.m. The focus of this con is on Women in the comic and entertainment industry! There will be vendors, panels, and workshops!
I went last year as Supergirl and I had a really great time! I will be attending again this year and will debut a new cosplay! There's a few things that I need to do with it. After that then it will be complete! Here's a hint (I think it will give it away lol):

I can't wait for WinC Con! Tickets are free but you have to RSVP on Eventrite, print out the confirmation and bring it with you. Be sure to come and also tell your friends!
Here's the facebook event page: https://www.facebook.com/events/1414900521983012/
Here's where you can get your ticket: https://www.eventbrite.com/e/winc-con-2017-tickets-30803129991
Wednesday, October 5, 2016
NYCC 2016 Line up and Panel
Hi guys! In case you didn't know, I will be attending NYCC this week and will be attending on Friday, Saturday, and Sunday.


On Friday I will be Supergirl, Saturday is Junko Enoshima, and Sunday is Juliet Starling.
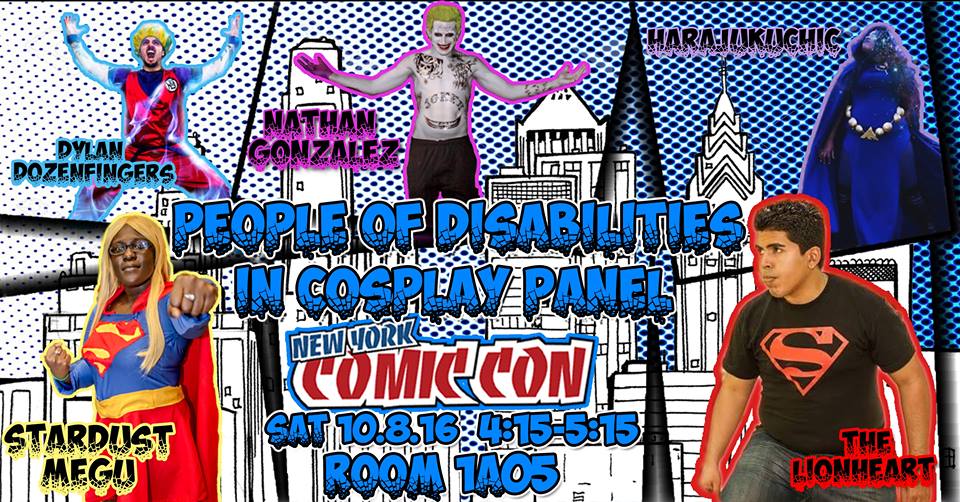
On Saturday, I will be one of the panelists along with The Lionheart, Harajukuchick, Nathan Gonzalez, and Dozenfingers Photography (who made this awesome flyer) in the panel, "People of Disabilities in Cosplay" Panel. We will talk about our experiences and thoughts in this topic as well as a Q&A. Prizes will also be given out! It will be at room 1A05 from 4:15-5:15pm. Feel free to come by!
Monday, March 28, 2016
Welcome!
Welcome to my blog! Here I will post my thoughts about cosplay, anime, video games, and other nerdy related stuff. I hope you guys will enjoy!


(Me as Sailor Pluto. Photo taken by Mochipix)
Subscribe to:
Posts (Atom)