

You will need:
- Chopsticks
- Paper Mache Ball or Table Tennis Ball
- Sticky Back/Adhesive Craft Foam Sheets or regular Craft Foam Sheets
- Bead Thread or String
- Beads (in the photo there's 2 but I used 3. It's up to you)
- Silver, White, Light Blue, and Red Acrylic or Spray Paint
- Mod Podge
- Varnish
- Needle
- Paint Brushes
- Scissors
- Xacto knife
- Hot Glue Gun & Sticks
- Paper
- Sharpie, Pencil, or Pen
- Sand Paper
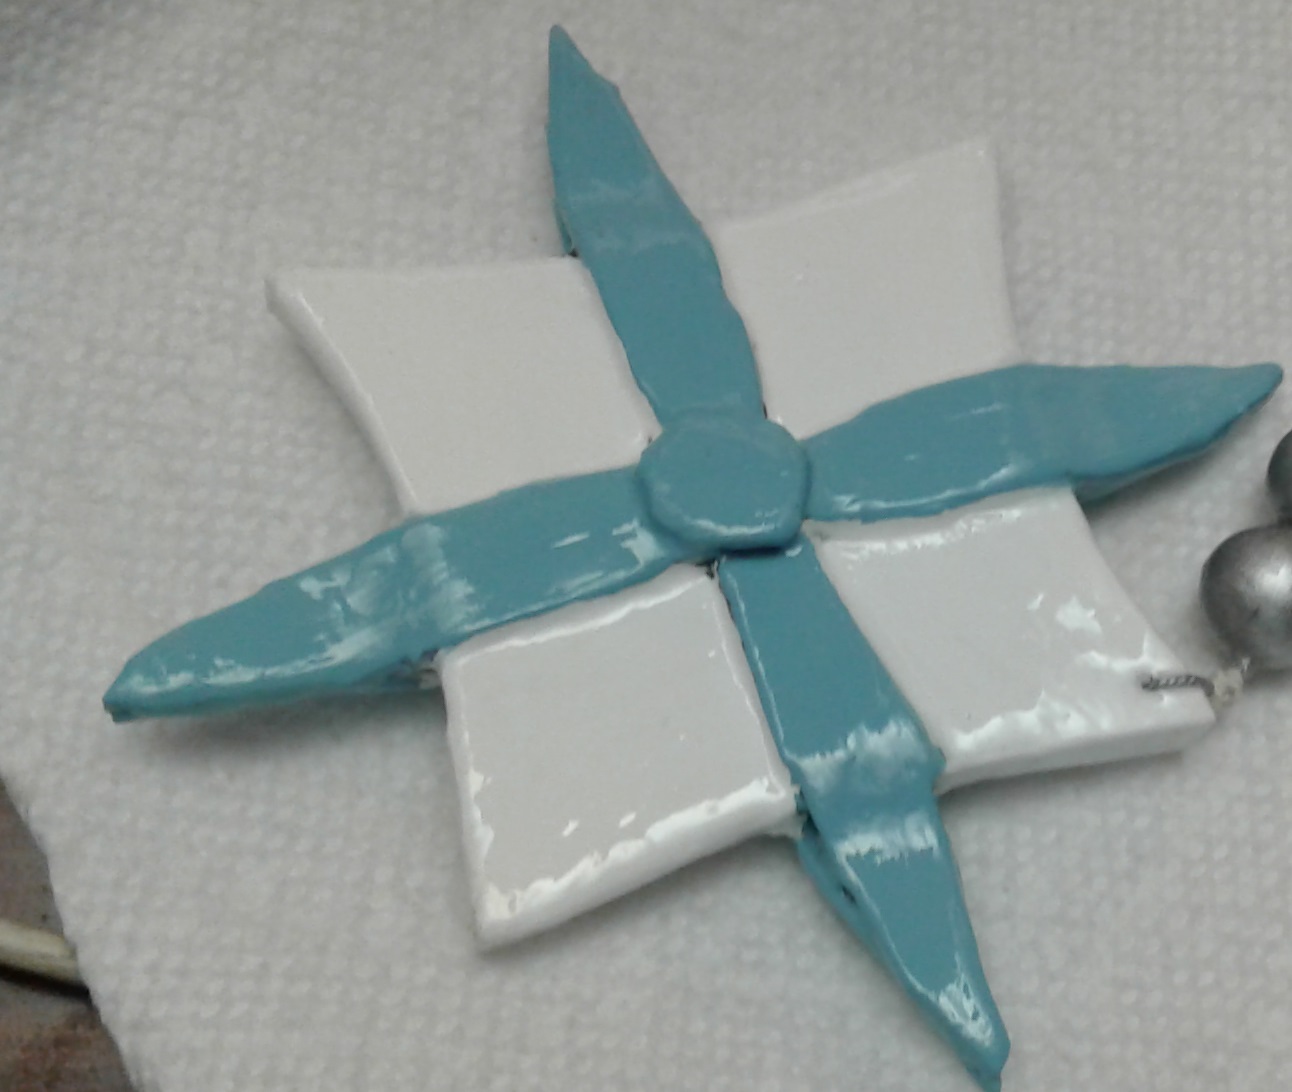
Symbol
Step 1: Draw the pattern. For the symbol, you need to draw a diamond/square shape, a petal-like shape, and a small circle. Then cut them out and put the pieces aside.

Step 2: Get your craft foam ready. If you're using sticky craft foam sheets then you can layer them together to make it thicker (stick the sticky sides together and make sure that the outside parts aren't the sticky sides). If you're using regular craft foam and it's thin then you can hot glue sheets together! (Note: This is for the square/diamond part of the symbol. You can do this for the other pieces as well if you want to, but you don't have to do it. If your craft foam is already thick then you can skip this). Then transfer your pattern pieces to your craft foam, trace it out and cut with scissors or an xacto knife. You need 1 of the square/diamond, 2 of the small circle (1 front and 1 back) and 8 of the petals (4 front and 4 back)
Step 3: Attach the rest of the pieces together on the square/diamond piece. Attach 4 of the petals first and then attach the circle in the middle. The petals and the circles were made out of the sticky craft foam so I just sicked them together. If you're using regular craft foam then hot glue them together. The petals should be sticking out.


Step 4: Repeat Step 3 on the other side. Make sure that the back petals are parallel to the front petals. Stick them together and press with your fingers from the tip to the edge of the square. If you're using regular craft foam then hot glue it and be careful. Sand it a bit with sand paper. You should get something like this:

Step 5: Apply about 4-5 layers of Mod Podge to the whole thing with your paint brush (front, back, sides, everything!). Wait until a layer dries before adding another layer. You have to apply Mod Podge, otherwise when you paint, the foam will absorb it and it won't look great.
Step 6: Paint the square white and the petals and circle light blue. You can use either acrylic or spray paint. Then pinch a small hole on a corner of the square with a needle and then coat the whole thing with varnish!
Symbol is done!
Beads
Step 1: Mei's hair pin has 2 beads, but I used 3 because I can! The beads that I used were jewelry beads. Sand your beads first. Then put a string or a bead thread through them and tie the ends. Then paint the beads with either silver acrylic paint or silver spray pant. Let it dry and coat with varnish. Then wait for it to dry.

Step 2: Get one of the ends of the string (cut it a bit if it's long) and put it through the hole of the symbol. Tie it a few times so that it's secure. Cut off any excess string.
The symbol and beads are together!

Stick
Step 1: Cut two circles of craft foam (make one of the circles smaller). If the circles are thin then layer them out like before. Sand them and the chopstick a bit. Then with your Xacto knife, pinch a small hole on the center of both circles. Layer the circles together (small circle on the bottom and bigger one on the top) and then skewer both circles with the chop stick. Make sure that the top has a bit of the chopstick sticking out.
Step 2: Apply 4-5 layers of Mod Podge to the whole thing and then paint the whole thing silver. Then apply a few coats of varnish.

Step 3: Get the other end of the string. Wrap it around the top part of the stick and tie it a few times and you should have this:

Ball
Step 1: Get your ball and cut a small hole in it with an xacto knife. Then apply a few layers of Mod Podge. I used a paper mache ball that I have. If you're using a table tennis ball then you must sand it first before you add Mod Podge!

Step 2: Paint a few coats of red. Let it dry and then coat it with varnish.


Finally!!
Get the stick and put a crap ton of hot glue on the top, shove it to the hole of the ball and hold it for a bit. Then hot glue the edges and hold. It will dry in a few minutes!
Finally, put it on and be a-Mei-zing!


Thanks for reading my tutorial! I hope it was helpful to you! If you have any questions then feel free to comment below!
No comments:
Post a Comment